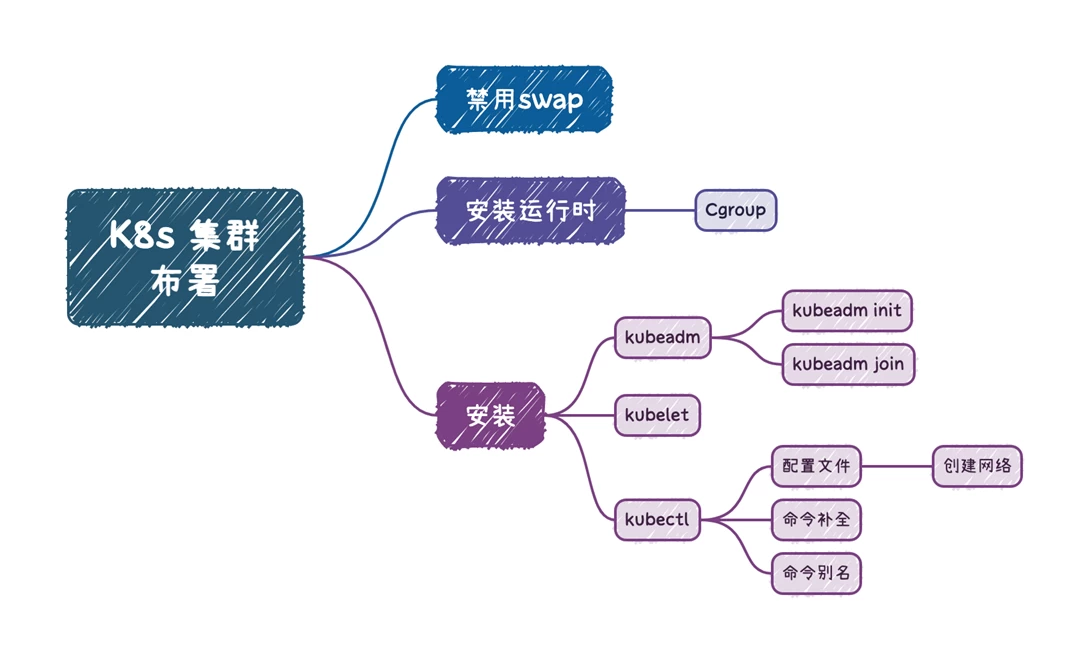
Kubernetes安装 kubeadm (Kubernetes v1.27)
准备练习环境
参考: Kubernetes 文档 / 入门 / 生产环境 / 使用部署工具安装 Kubernetes / 使用 kubeadm 引导集群 / 安装 kubeadm
- 一台兼容的 Linux 主机。Kubernetes 项目为基于 Debian 和 Red Hat 的 Linux 发行版以及一些不提供包管理器的发行版提供通用的指令
- 每台机器 2 GB 或更多的 RAM(如果少于这个数字将会影响你应用的运行内存)
- CPU 2 核心及以上
- 集群中的所有机器的网络彼此均能相互连接(公网和内网都可以)
- 节点之中不可以有重复的主机名、MAC 地址或 product_uuid。请参见这里了解更多详细信息。
- 开启机器上的某些端口。请参见这里了解更多详细信息。
- 禁用交换分区。为了保证 kubelet 正常工作,你
必须
禁用交换分区
-
- 例如,sudo swapoff -a 将暂时禁用交换分区。要使此更改在重启后保持不变,请确保在如 /etc/fstab、systemd.swap 等配置文件中禁用交换分区,具体取决于你的系统如何配置
- 你可以使用命令 ip link 或 ifconfig -a 来获取网络接口的 MAC 地址
- 可以使用 sudo cat /sys/class/dmi/id/product_uuid 命令对 product_uuid 校验
一般来讲,硬件设备会拥有唯一的地址,但是有些虚拟机的地址可能会重复。 Kubernetes 使用这些值来唯一确定集群中的节点。 如果这些值在每个节点上不唯一,可能会导致安装失败
虚拟机
新建... / 创建自定虚拟机 / Linux / Ubuntu 64位
- 设置过程
| ID | 『虚拟机』设置 | 建议配置 | 默认值 | 说明 |
| 1 | 处理器 | - | 2 | 最低要求 |
| 2 | 内存 | - | 4096 MB | 节约内存 |
| 3 | 显示器 | 取消复选加速 3D 图形 | 复选 | 节约内存 |
| 4 | 网络适配器 | - | nat | 需上网 |
| 5 | 硬盘 | 40GB | 20 GB | 保证练习容量 |
| 6 | 选择固件类型 | UEFI | 传统 BIOS | VMware Fusion 支持嵌套虚拟化 |
- 设置结果
| ID | Your computer's name | CPU 核 | RAM | DISK | NIC |
| 1 | k8s-master | 4 或更多 | 8 GB或更多 | 40 GB | nat |
| 2 | k8s-worker1 | 同上 | 2 GB或更多 | 同上 | 同上 |
| 3 | k8s-worker2 | 同上 | 同上 | 同上 | 同上 |
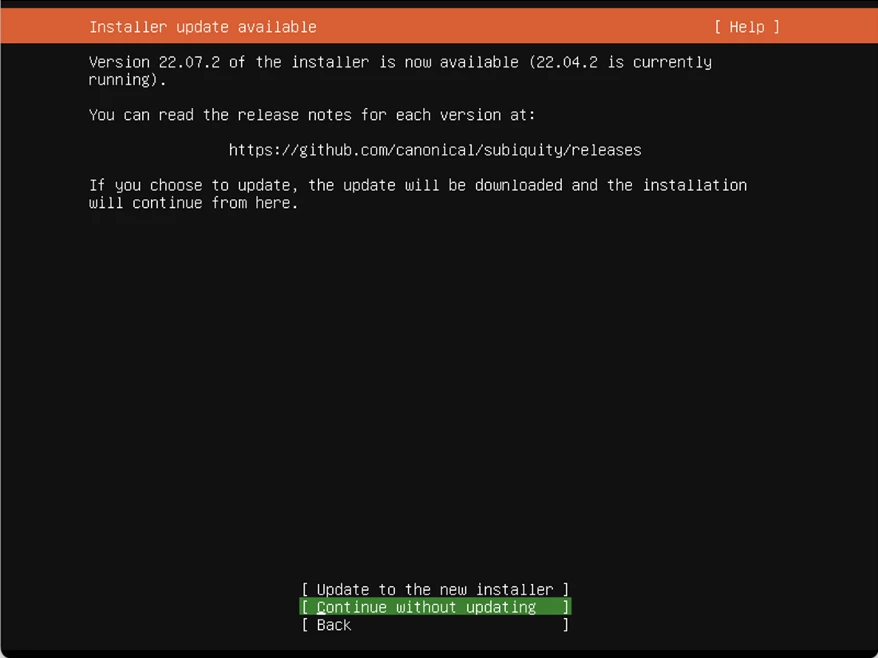
1.安装 Ubuntu 22.04 LTS
1.Willkommen! Bienvenue! Welcome! Welkom!
[ English ]

- Installer update available
[ Continue without updating ]
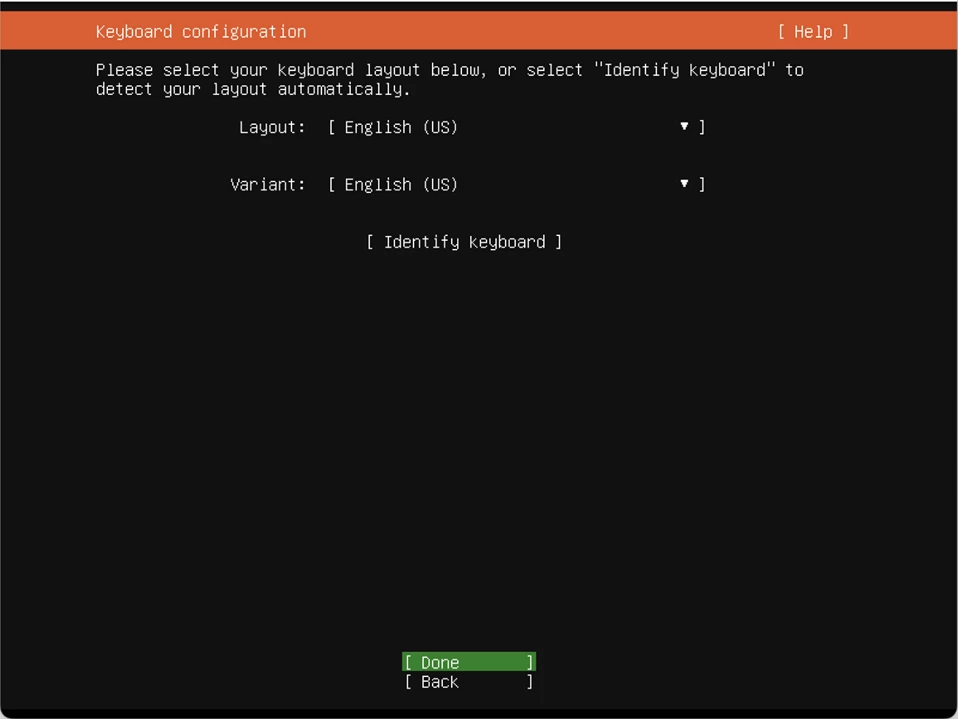
- Keyboard configuration
[ Done ]
- Choose type of install
(X) Ubuntu Server (minimized) / [ Done ]

- Network connections
[ Done ]

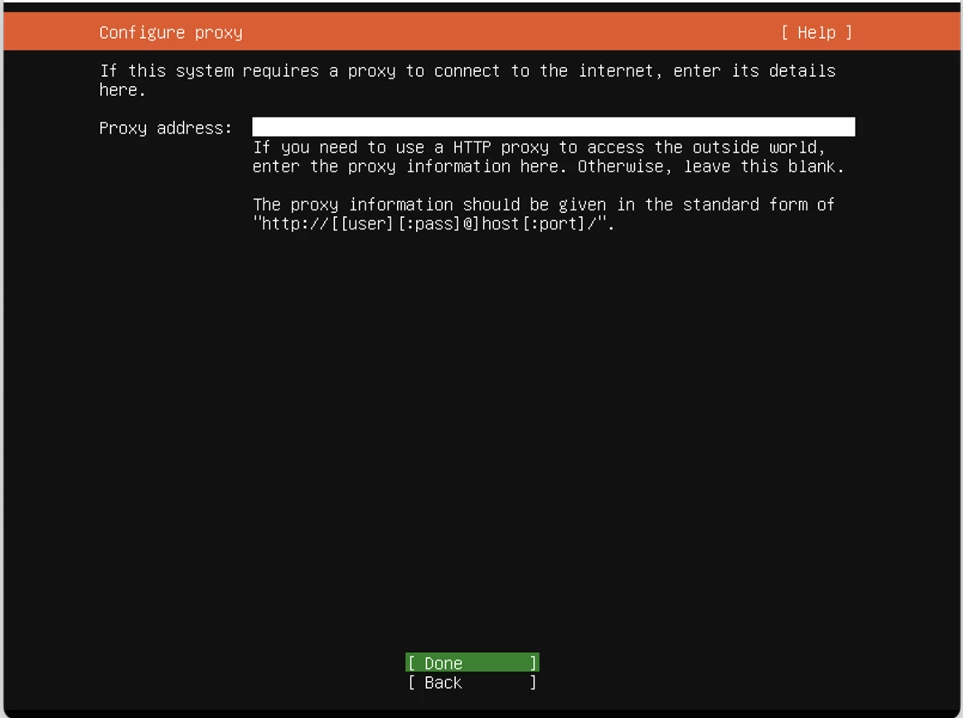
- Configure proxy
[ Done ]
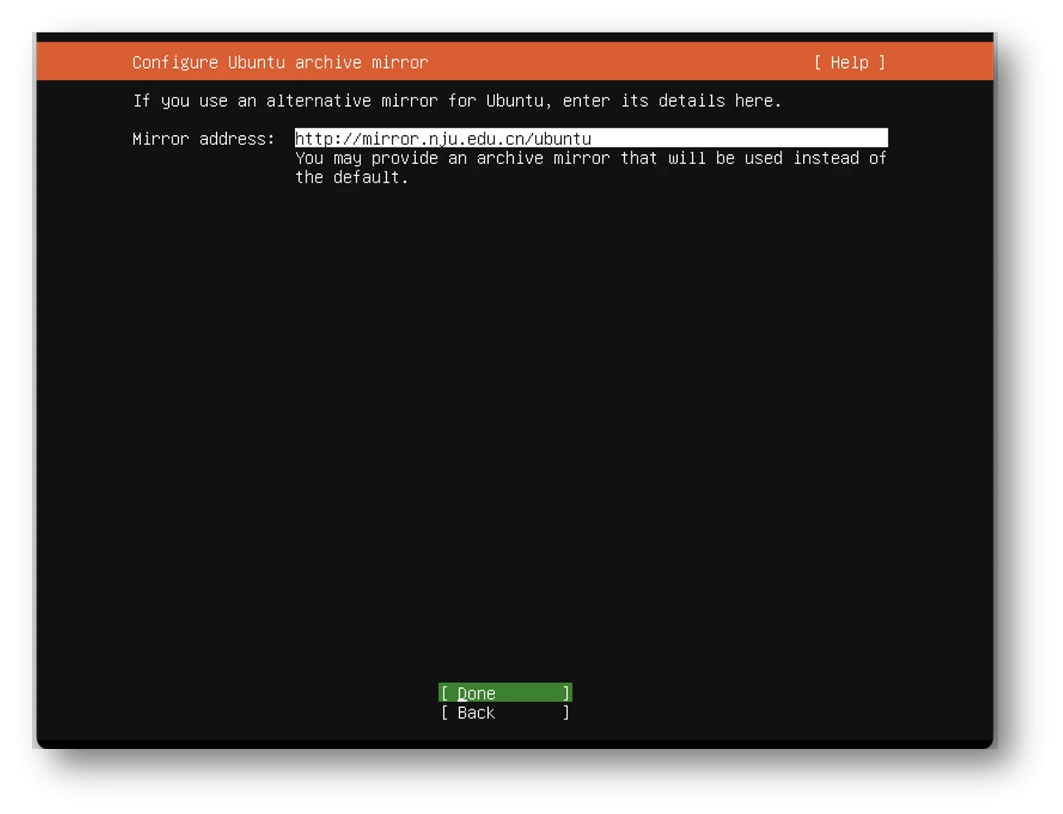
- Configure Ubuntu archive mirror
Mirror address: http://mirror.nju.edu.cn/ubuntu / [ Done ]
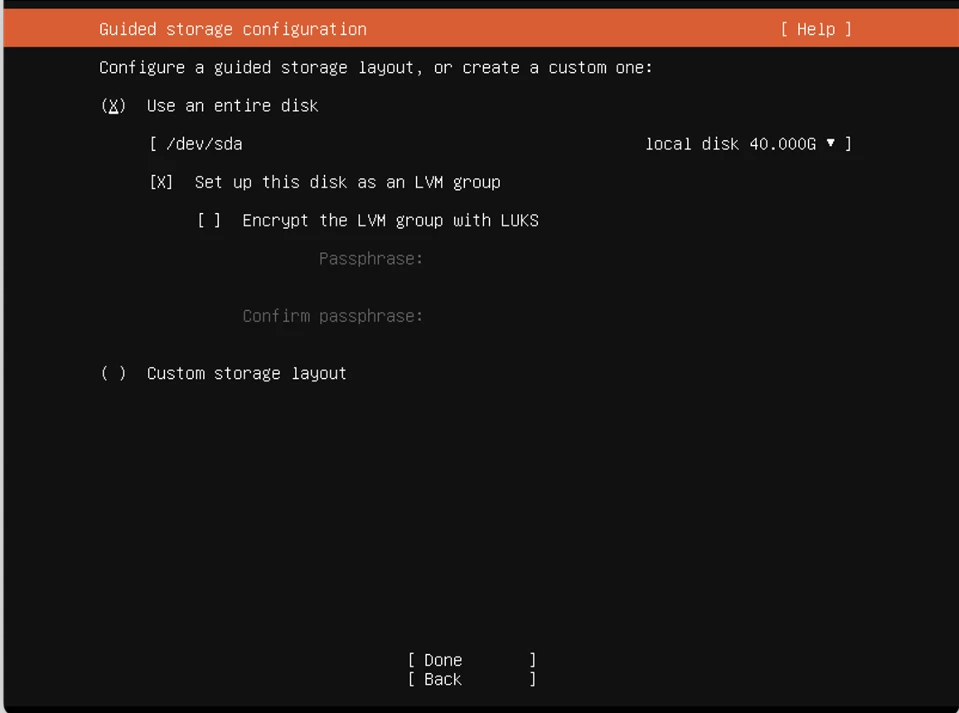
- Guided storage configuration
[ Done ]
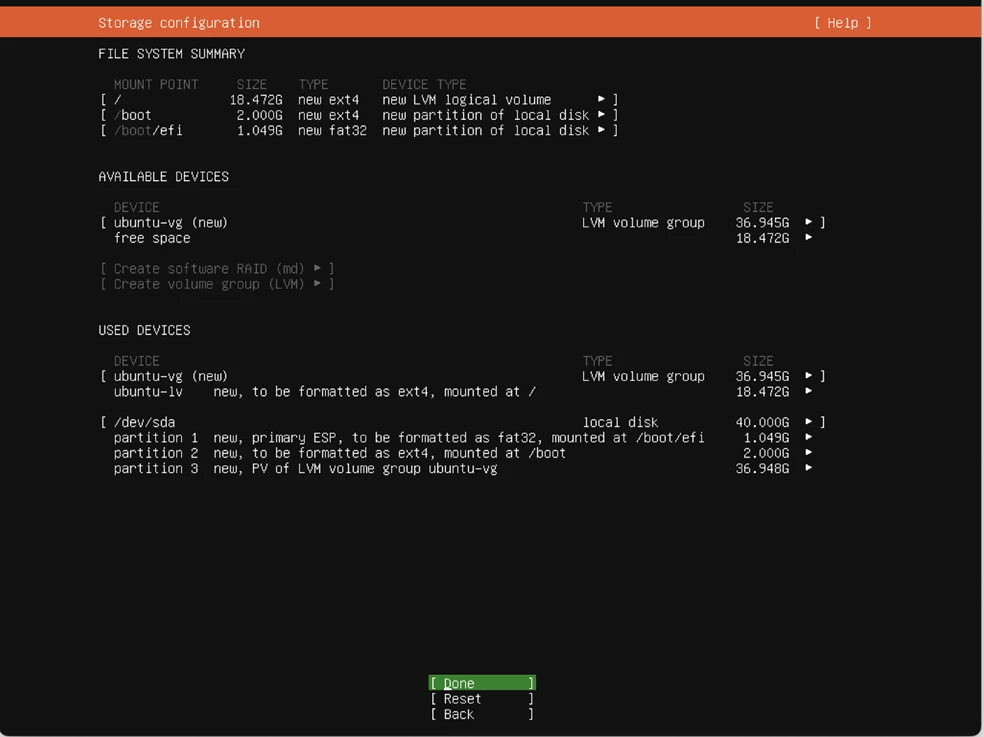
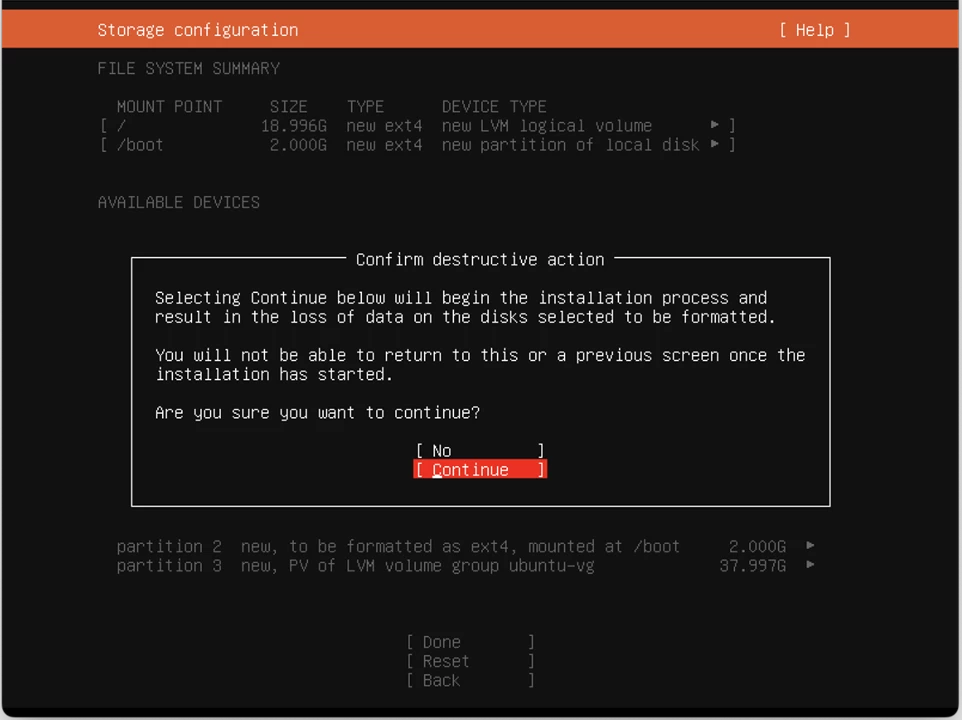
- Storage configuration
[ Done ]
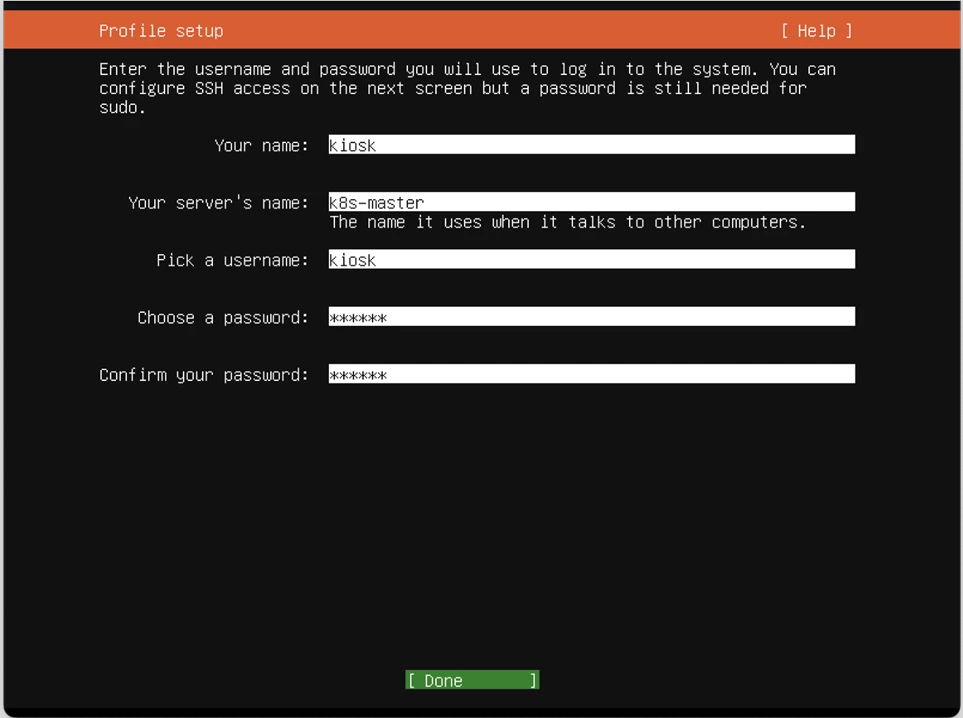
- Profile setup
Your name: kiosk
Your server 's name: k8s-master
Pick a username: kiosk
Choose a password: ubuntu
Confirm your password: ubuntu
/ [ Done ]
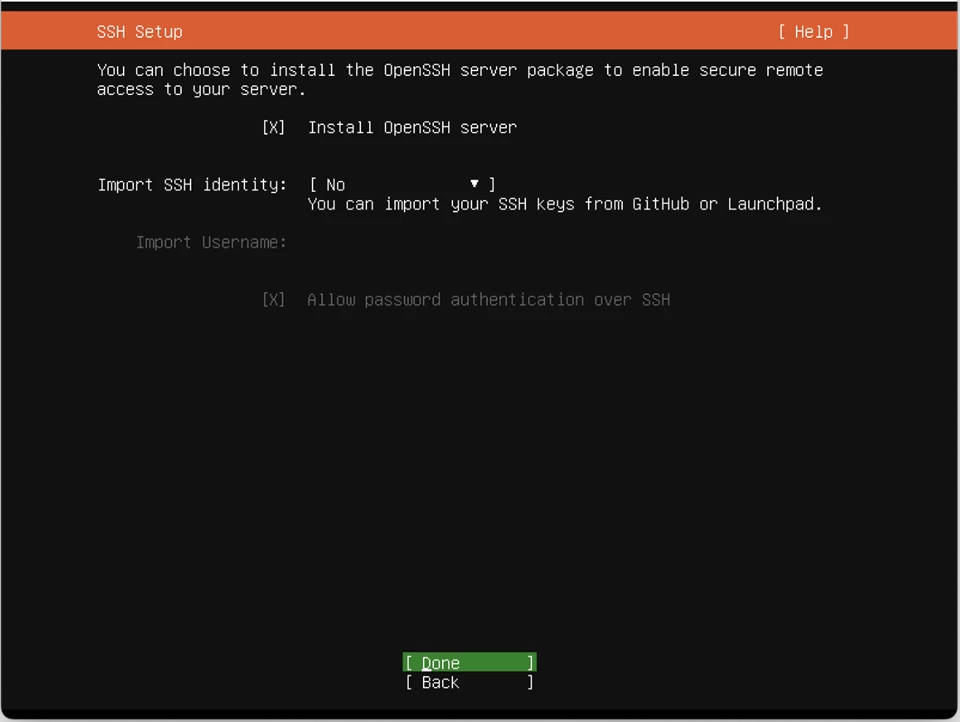
- SSH Setup
[X] Install OpenSSH server / [ Done ]
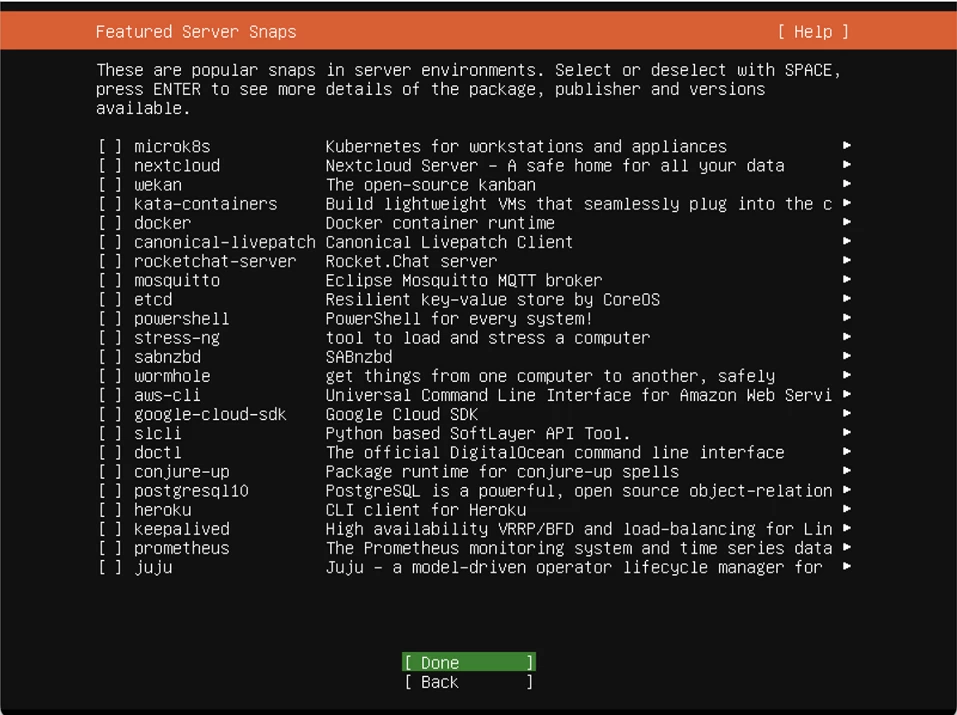
- Featured Server Snaps
[ Done ]
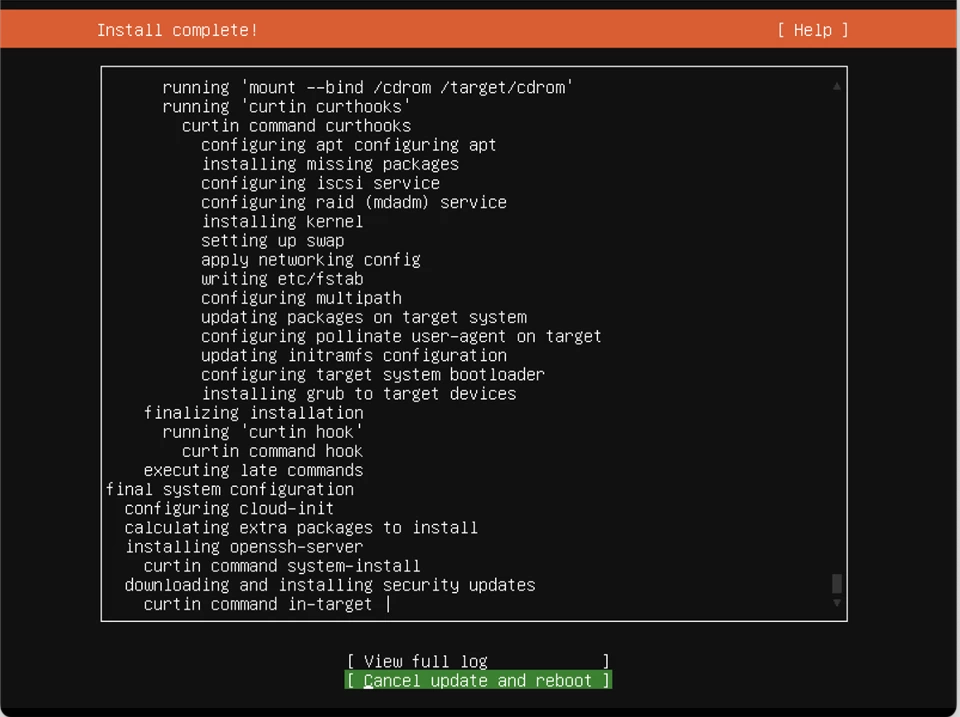
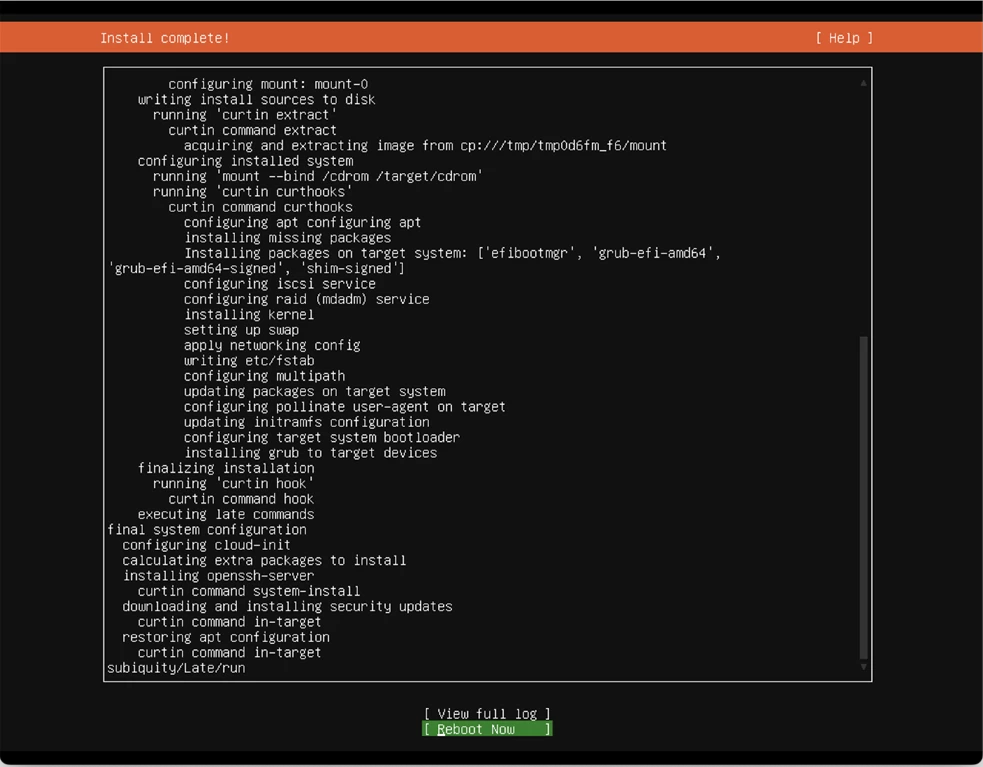
- Install complete!
🅰️ [ Cancel update and reboot ]
🅱️ [ Reboot Now ]
准备工作
[kiosk@k8s-master | k8s-worker1 | k8s-worker2]$
设置时区
timedatectl set-timezone Asia/Shanghai
设置当前用户sudo免密 [选做]
不想每次都输入密码 - 加速
# 当前用户的密码
OS_PASS=ubuntu
# 缓存 sudo 密码 ubuntu
echo $OS_PASS | sudo -v -S
# 永久生效
sudo tee /etc/sudoers.d/$USER >/dev/null <<EOF
$USER ALL=(ALL) NOPASSWD: ALL
EOF
cat /etc/sudoers.d/$USER使用国内镜像仓库 [选做]
软件安装 - 加速
if ! curl --connect-timeout 2 google.com &>/dev/null; then
# C. 国内
MIRROR_URL=http://mirror.nju.edu.cn/ubuntu
CODE_NAME=$(lsb_release -cs)
COMPONENT="main restricted universe multiverse"
# 生成软件仓库源
sudo tee /etc/apt/sources.list >/dev/null <<EOF
deb $MIRROR_URL $CODE_NAME $COMPONENT
deb $MIRROR_URL $CODE_NAME-updates $COMPONENT
deb $MIRROR_URL $CODE_NAME-backports $COMPONENT
deb $MIRROR_URL $CODE_NAME-security $COMPONENT
EOF
fi
cat /etc/apt/sources.list安装相关软件 <必做>
# Which services should be restarted?
NFILE=/etc/needrestart/needrestart.conf
sudo sed -i \
-e '/nrconf{restart}/{s+i+a+;s+#++}' \
$NFILE
grep nrconf{restart} $NFILE
# 手动更新
sudo apt -y update
## 安装
# - 远程, ssh 免交互, 编辑文件, storageClass
# - Tab 自动补全, nc, ping
# - vm-tools
sudo apt -y install \
openssh-server sshpass vim nfs-common \
bash-completion netcat-openbsd iputils-ping \
open-vm-tools设置静态 IP <必做>
# 获取 IP
NICP=$(ip a | awk '/inet / {print $2}' | grep -v ^127)
if [ "$(echo $NICP | wc -w)" != "1" ]; then
select IP1 in $NICP; do
break
done
else
IP1=$NICP
fi
echo -e " addresses: \e[1;34m${IP1}\e[0;0m"
# 获取网卡名
NICN=$(ip a | awk '/^2:/ {print $2}' | sed 's/://')
echo -e " ethernets: \e[1;34m${NICN}\e[0;0m"
# 获取网关
NICG=$(ip route | awk '/^default/ {print $3}')
echo -e " routes: \e[1;34m${NICG}\e[0;0m"
# 获取 DNS
unset DNS; unset DN
for i in 114.114.114.114 8.8.4.4 8.8.8.8; do
if nc -w 2 -zn $i 53 &>/dev/null; then
DNS1=$i
DNS="$DNS, $DNS1"
fi
done
echo -e " nameservers: \e[1;34m${DNS#, }\e[0;0m"
# 更新网卡配置文件
NYML=/etc/netplan/00-installer-config.yaml
sudo tee $NYML >/dev/null <<EOF
network:
ethernets:
$NICN:
dhcp4: false
addresses: [$IP1]
routes:
- to: default
via: $NICG
nameservers:
addresses: [${DNS#, }]
version: 2
EOF
cat $NYML
# dns 解析文件链接
sudo ln -sf /run/systemd/resolve/resolv.conf /etc/resolv.conf
# active
sudo netplan apply编辑 hosts <必做>
# 显示 ip 地址和主机名,方便复制
echo $(hostname -I) $(hostname)
sudo tee -a /etc/hosts >/dev/null <<EOF
# K8s-cluster
192.168.147.128 k8s-master
192.168.147.129 k8s-worker1
192.168.147.130 k8s-worker2
EOF
cat /etc/hosts设置 root 密码 [选做]
ROOT_PASS=ubuntu
(echo $ROOT_PASS; echo $ROOT_PASS) \
| sudo passwd root
echo PermitRootLogin yes \
| sudo tee -a /etc/ssh/sshd_config
sudo systemctl restart sshdssh 免密 [选做]
# 生成 keypair
ssh-keygen -f ~/.ssh/id_rsa -N ''

# 拷贝公钥
ROOT_PASS=ubuntu

NODES=$(egrep -v '^[a-f]|^:|^#|^$|^127' /etc/hosts | awk '{print $2}')

echo -e "NODES: \e[1;34m$(echo $NODES)\e[0;0m"

for i in $NODES; do
for j in kiosk root; do
sshpass -p$ROOT_PASS \
ssh-copy-id -o StrictHostKeyChecking=no \
$j@$i
done
done
禁用 swap <必做>
# 交换文件
SWAPF=$(awk '/swap/ {print $1}' /etc/fstab)

# 立即禁用
sudo swapoff $SWAPF

# 永久禁用
sudo sed -i '/swap/d' /etc/fstab

# 删除交换文件
sudo rm $SWAPF

# 确认
free -h
扩容 <必做>
df -h / | egrep [0-9]+G

# 逻辑卷名
LVN=$(sudo lvdisplay | awk '/Path/ {print $3}')

echo -e " LV Name: \e[1;34m${LVN}\e[0;0m"

# 扩容
sudo lvextend -r -l 100%PVS $LVN \
> /dev/null

df -h / | egrep [0-9]+G
模块支持 <必做>
## 1. Bridge
# [ERROR FileContent-.proc-sys-net-bridge-bridge-nf-call-iptables]: /proc/sys/net/bridge/bridge-nf-call-iptables does not exist
# 安装
sudo apt -y install bridge-utils

# 永久生效
MFILE=/etc/modules-load.d/br.conf

sudo tee $MFILE >/dev/null <<EOF
br_netfilter
EOF

cat $MFILE

# 立即生效
sudo modprobe br_netfilter

lsmod | grep br

## 2. 内核支持
# [ERROR FileContent-.proc-sys-net-ipv4-ip_forward]: /proc/sys/net/ipv4/ip_forward contents are not set to 1
sudo tee /etc/sysctl.d/k8s.conf >/dev/null <<EOF
net.ipv4.ip_forward=1
vm.swappiness=0
vm.overcommit_memory=1
vm.panic_on_oom=0
EOF

# 立即生效
sudo sysctl -p /etc/sysctl.d/k8s.conf

sudo sysctl -a | grep 'ip_forward '
安装运行时 <必做>
## 创建镜像仓库文件
AFILE=/etc/apt/sources.list.d/docker.list

if ! curl --connect-timeout 2 google.com &>/dev/null; then
# C. 国内
AURL=https://mirror.nju.edu.cn/docker-ce
else
# A. 国外
AURL=https://download.docker.com
fi

sudo tee $AFILE >/dev/null <<EOF
deb $AURL/linux/ubuntu $(lsb_release -cs) stable
EOF

cat $AFILE

# 导入公钥
curl -fsSL https://download.docker.com/linux/ubuntu/gpg \
| sudo apt-key add -

# W: Key is stored in legacy trusted.gpg keyring
sudo cp /etc/apt/trusted.gpg /etc/apt/trusted.gpg.d

# 更新索引
sudo apt-get update

# 安装 containerd
sudo apt-get install containerd.io

# 生成默认配置文件
containerd config default \
| sudo tee /etc/containerd/config.toml >/dev/null

## 修改配置文件
# "alpine"
# 376ms  https://docker.nju.edu.cn
# 623ms  http://hub-mirror.c.163.com
# 10.97s https://docker.mirrors.ustc.edu.cn
sudo sed -i \
-e '/SystemdCgroup/s+false+true+' \
/etc/containerd/config.toml

if ! curl --connect-timeout 2 google.com &>/dev/null; then
# C. 国内
REISTRY_OLD=registry.k8s.io
REGISTRY_NEW=registry.aliyuncs.com/google_containers
M1='[plugins."io.containerd.grpc.v1.cri".registry.mirrors."docker.io"]'
M2='endpoint = ["https://docker.nju.edu.cn"]'

sudo sed -i \
-e "/sandbox_image/s+$REISTRY_OLD+$REGISTRY_NEW+" \
-e "/registry.mirrors/a\        $M1" \
-e "/registry.mirrors/a\          $M2" \
/etc/containerd/config.toml
fi

# 服务重启
sudo systemctl restart containerd

## 下载 crictl 压缩包
if ! curl --connect-timeout 2 google.com &>/dev/null; then
# C. 国内
CURL=http://k8s.ruitong.cn:8080/K8s
else
# A. 国外
CURL=https://github.com/kubernetes-sigs/cri-tools/releases/download/v1.28.0
fi

TFILE=crictl-v1.28.0-linux-amd64.tar.gz

curl -LO# $CURL/$TFILE

# 解压 crictl
tar -xf $TFILE

# 安装 crictl 命令
sudo cp crictl /usr/bin/

# 创建 crictl 配置文件
sudo tee /etc/crictl.yaml <<EOF >/dev/null
runtime-endpoint: unix:///run/containerd/containerd.sock
image-endpoint: unix:///run/containerd/containerd.sock
timeout: 10
debug: false
pull-image-on-create: true
EOF

# 注销重新登陆后,生效
sudo usermod -aG root $USER
安装 K8s
[kiosk@k8s-master | k8s-worker1 | k8s-worker2]$
-
安装 kubeadm、kubelet 和 kubectl
# 更新 apt 包索引并安装使用 Kubernetes apt 仓库所需要的包
sudo apt -y install apt-transport-https ca-certificates curl
## 添加 Kubernetes apt 仓库
sudo mkdir /etc/apt/keyrings &>/dev/null
KFILE=/etc/apt/keyrings/kubernetes-archive-keyring.gpg
if ! curl --connect-timeout 2 google.com &>/dev/null; then
# C. 国内
KURL=http://k8s.ruitong.cn:8080/K8s
AURL=https://mirror.nju.edu.cn/kubernetes/apt
else
# A. 国外
KURL=https://packages.cloud.google.com
AURL=https://apt.kubernetes.io/
fi
sudo curl -fsSLo $KFILE $KURL/apt/doc/apt-key.gpg
sudo tee /etc/apt/sources.list.d/kubernetes.list <<EOF >/dev/null
deb [signed-by=$KFILE] $AURL kubernetes-xenial main
EOF
sudo apt -y update
# 官方考试版本-CKA
CKx_URL=https://training.linuxfoundation.cn/certificates/1

:<<EOF
# 官方考试版本-CKS
CKx_URL=https://training.linuxfoundation.cn/certificates/16
EOF

KV=$(curl -s $CKx_URL | grep -Eo 软件版本.*v[0-9].[0-9]+ | awk '{print $NF}')

echo -e " The exam is based on Kubernetes: \e[1;34m${KV#v}\e[0;0m"

# 列出所有小版本
sudo apt-cache madison kubelet | grep ${KV#v}

# 安装 kubelet、kubeadm 和 kubectl 考试版本
sudo apt -y install \
kubelet=${KV#v}.1-00 \
kubeadm=${KV#v}.1-00 \
kubectl=${KV#v}.1-00
# 官方考试版本 - CKAD
CKx_URL=https://training.linuxfoundation.cn/certificates/4

KV=$(curl -s $CKx_URL | grep -Eo 软件版本.*v[0-9].[0-9]+ | awk '{print $NF}')

echo -e " The exam is based on Kubernetes: \e[1;34m${KV#v}\e[0;0m"

# 列出所有小版本
sudo apt-cache madison kubelet | grep ${KV#v}

# 安装 kubelet、kubeadm 和 kubectl 考试版本
sudo apt -y install \
kubelet=${KV#v}.1-00 \
kubeadm=${KV#v}.1-00 \
kubectl=${KV#v}.1-00

# 锁定版本
sudo apt-mark hold kubelet kubeadm kubectl
[kiosk@k8s-master]$
- 初始化
# 生成初始文件
sudo kubeadm config print init-defaults \
> kubeadm-config.yaml

# IP 地址
NICP=$(ip a | awk '/inet / {print $2}' | grep -v ^127 | sed 's+/.*++')

if [ "$(echo $NICP | wc -w)" != "1" ]; then
select IP1 in $NICP; do
break
done
else
IP1=$NICP
fi

echo -e " advertiseAddress: \e[1;34m${IP1}\e[0;0m"

# kubeadm-config.yaml
sudo sed -i \
-e "/advertiseAddress/s+:.*+: $IP1+" \
-e "/name/s+:.*+: $(hostname -s)+" \
-e "/clusterName/s+:.*+: ck8s+" \
kubeadm-config.yaml

# 手动拉取镜像 [必选]
# kubeadm init 时,会自动拉取
if ! curl --connect-timeout 2 google.com &>/dev/null; then
# C. 国内
RURL=registry.aliyuncs.com/google_containers

sudo kubeadm config images pull \
--image-repository $RURL \
--kubernetes-version ${KV#v}.1

sudo sed -i \
-e "/imageRepository/s+:.*+: $RURL+" \
kubeadm-config.yaml
fi

# 验证+k8s
sudo crictl images
# 验证-k8s
sudo ctr -n k8s.io image ls

# 使用初始文件,初始化集群
sudo kubeadm init \
--config kubeadm-config.yaml
[init] Using Kubernetes version: v1.27.0 [preflight] Running pre-flight checks [preflight] Pulling images required for setting up a Kubernetes cluster [preflight] This might take a minute or two, depending on the speed of your internet connection [preflight] You can also perform this action in beforehand using 'kubeadm config images pull' W0612 04:18:15.295414 10552 images.go:80] could not find officially supported version of etcd for Kubernetes v1.27.0, falling back to the nearest etcd version (3.5.7-0) W0612 04:18:30.785239 10552 checks.go:835] detected that the sandbox image "registry.aliyuncs.com/google_containers/pause:3.6" of the container runtime is inconsistent with that used by kubeadm. It is recommended that using "registry.aliyuncs.com/google_containers/pause:3.9" as the CRI sandbox image. [certs] Using certificateDir folder "/etc/kubernetes/pki" [certs] Generating "ca" certificate and key [certs] Generating "apiserver" certificate and key [certs] apiserver serving cert is signed for DNS names [k8s-master kubernetes kubernetes.default kubernetes.default.svc kubernetes.default.svc.cluster.local] and IPs [10.96.0.1 192.168.147.128] [certs] Generating "apiserver-kubelet-client" certificate and key [certs] Generating "front-proxy-ca" certificate and key [certs] Generating "front-proxy-client" certificate and key [certs] Generating "etcd/ca" certificate and key [certs] Generating "etcd/server" certificate and key [certs] etcd/server serving cert is signed for DNS names [k8s-master localhost] and IPs [192.168.147.128 127.0.0.1 ::1] [certs] Generating "etcd/peer" certificate and key [certs] etcd/peer serving cert is signed for DNS names [k8s-master localhost] and IPs [192.168.147.128 127.0.0.1 ::1] [certs] Generating "etcd/healthcheck-client" certificate and key [certs] Generating "apiserver-etcd-client" certificate and key [certs] Generating "sa" key and public key [kubeconfig] Using kubeconfig folder "/etc/kubernetes" [kubeconfig] Writing "admin.conf" kubeconfig file [kubeconfig] Writing "kubelet.conf" kubeconfig file [kubeconfig] Writing "controller-manager.conf" kubeconfig file [kubeconfig] Writing "scheduler.conf" kubeconfig file [kubelet-start] Writing kubelet environment file with flags to file "/var/lib/kubelet/kubeadm-flags.env" [kubelet-start] Writing kubelet configuration to file "/var/lib/kubelet/config.yaml" [kubelet-start] Starting the kubelet [control-plane] Using manifest folder "/etc/kubernetes/manifests" [control-plane] Creating static Pod manifest for "kube-apiserver" [control-plane] Creating static Pod manifest for "kube-controller-manager" [control-plane] Creating static Pod manifest for "kube-scheduler" [etcd] Creating static Pod manifest for local etcd in "/etc/kubernetes/manifests" W0612 04:18:33.894812 10552 images.go:80] could not find officially supported version of etcd for Kubernetes v1.27.0, falling back to the nearest etcd version (3.5.7-0) [wait-control-plane] Waiting for the kubelet to boot up the control plane as static Pods from directory "/etc/kubernetes/manifests". This can take up to 4m0s [apiclient] All control plane components are healthy after 6.502471 seconds [upload-config] Storing the configuration used in ConfigMap "kubeadm-config" in the "kube-system" Namespace [kubelet] Creating a ConfigMap "kubelet-config" in namespace kube-system with the configuration for the kubelets in the cluster [upload-certs] Skipping phase. Please see --upload-certs [mark-control-plane] Marking the node k8s-master as control-plane by adding the labels: [node-role.kubernetes.io/control-plane node.kubernetes.io/exclude-from-external-load-balancers] [mark-control-plane] Marking the node k8s-master as control-plane by adding the taints [node-role.kubernetes.io/control-plane:NoSchedule] [bootstrap-token] Using token: abcdef.0123456789abcdef [bootstrap-token] Configuring bootstrap tokens, cluster-info ConfigMap, RBAC Roles [bootstrap-token] Configured RBAC rules to allow Node Bootstrap tokens to get nodes [bootstrap-token] Configured RBAC rules to allow Node Bootstrap tokens to post CSRs in order for nodes to get long term certificate credentials [bootstrap-token] Configured RBAC rules to allow the csrapprover controller automatically approve CSRs from a Node Bootstrap Token [bootstrap-token] Configured RBAC rules to allow certificate rotation for all node client certificates in the cluster [bootstrap-token] Creating the "cluster-info" ConfigMap in the "kube-public" namespace [kubelet-finalize] Updating "/etc/kubernetes/kubelet.conf" to point to a rotatable kubelet client certificate and key [addons] Applied essential addon: CoreDNS [addons] Applied essential addon: kube-proxy
Your Kubernetes control-plane has initialized successfully!
To start using your cluster, you need to run the following as a regular user:
mkdir -p $HOME/.kube
sudo cp -i /etc/kubernetes/admin.conf $HOME/.kube/config
sudo chown $(id -u):$(id -g) $HOME/.kube/config
Alternatively, if you are the root user, you can run:
export KUBECONFIG=/etc/kubernetes/admin.conf
You should now deploy a pod network to the cluster. Run "kubectl apply -f [podnetwork].yaml" with one of the options listed at: https://kubernetes.io/docs/concepts/cluster-administration/addons/
Then you can join any number of worker nodes by running the following on each as root:
kubeadm join 192.168.147.128:6443 --token abcdef.0123456789abcdef \
--discovery-token-ca-cert-hash sha256:49ff7a97c017153baee67c8f44fa84155b8cf06ca8cee067f766ec252cb8d1ac
- 配置文件 - Client
参考 init 的输出提示
# 创建目录
mkdir -p ~/.kube
# user 复制配置文件
sudo \cp /etc/kubernetes/admin.conf \
~/.kube/config
sudo chown $(id -u):$(id -g) ~/.kube/config
ll ~/.kube/config | grep $USER
# root 变量
sudo tee -a ~root/.bashrc >/dev/null <<EOF
export KUBECONFIG=/etc/kubernetes/admin.conf
EOF
sudo grep KUBECONFIG ~root/.bashrc
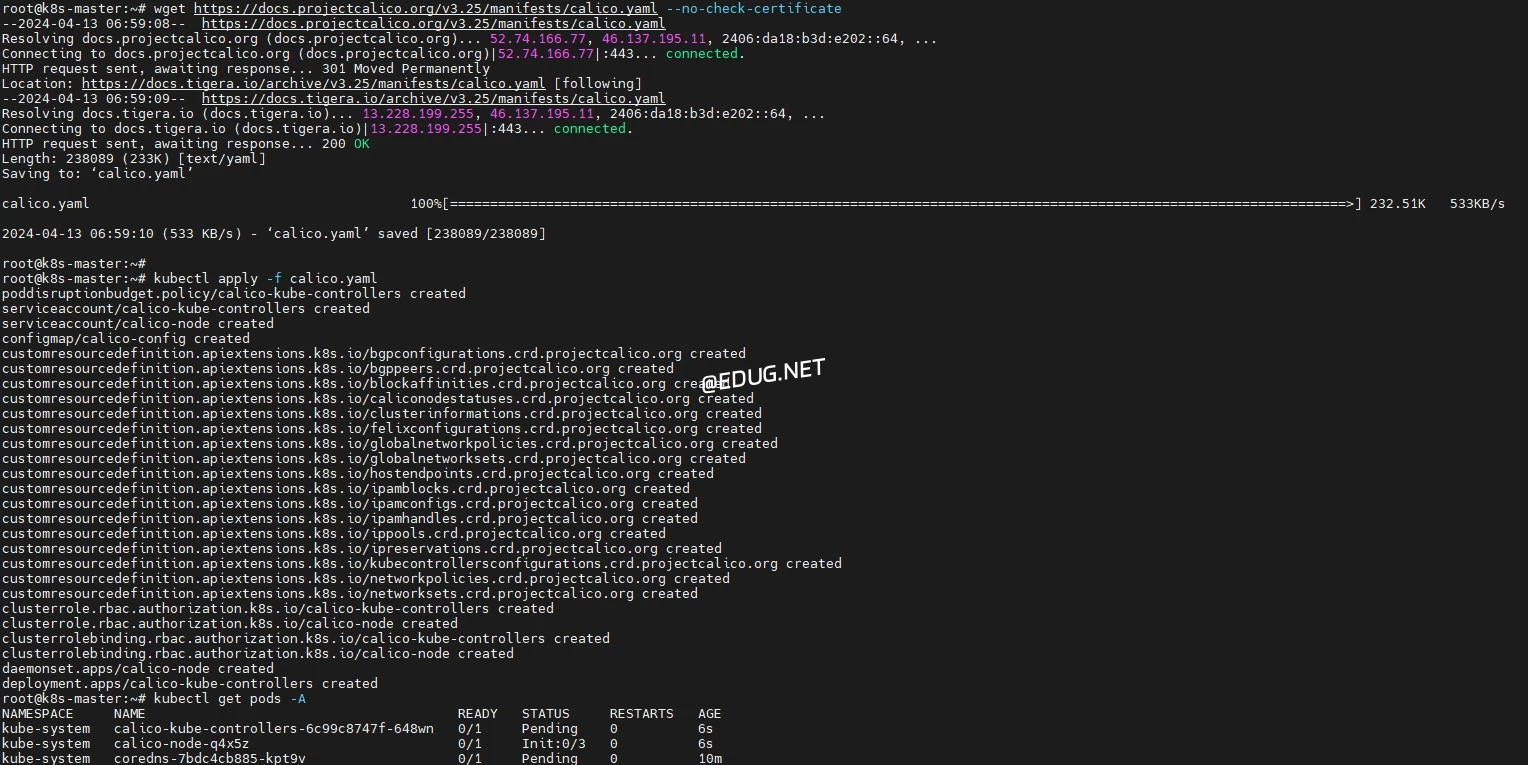
- 创建网络
参考 init 的输出提示
- https://www.tigera.io/project-calico/ Home -> Calico Open Source Install -> CalicoKubernetesSelf-managed on-premises Install Calico -> Manifest -> Install Calico with Kubernetes API datastore, 50 nodes or less
curl https://raw.githubusercontent.com/projectcalico/calico/v3.26.1/manifests/calico.yaml -O

CFILE=calico/v3.26.1/manifests/calico.yaml

if ! curl --connect-timeout 2 google.com &>/dev/null; then
# C. 国内
CURL=http://k8s.ruitong.cn:8080/K8s
else
# A. 国外
CURL=https://raw.githubusercontent.com/projectcalico
fi

kubectl apply -f $CURL/$CFILE
- 命令补全 - Client [建议]
查看帮助

$ kubectl completion --help

## 立即生效
source <(kubectl completion bash)

## 永久生效
mkdir ~/.kube 2>/dev/null

kubectl completion bash \
> ~/.kube/completion.bash.inc

tee -a ~/.bashrc <<EOF >/dev/null
# Kubectl shell completdion
source ~/.kube/completion.bash.inc
EOF

source ~/.bashrc

# kubectl <Tab><Tab>
- 命令别名 - Client[建议]
参考网址 https://kubernetes.io/zh-cn/docs/reference/kubectl/cheatsheet/

# 永久生效
tee -a ~/.bashrc <<EOF >/dev/null
alias k='kubectl'
complete -F __start_kubectl k
EOF

# 立即生效
source ~/.bashrc

# k <Tab><Tab>
[kiosk@k8s-worker1 | k8s-worker2]$
- 加入集群
- 参考 init 的输出提示
- 找不到提示,参照附录 A1
sudo \
kubeadm join 192.168.147.128:6443 --token abcdef.0123456789abcdef \
--discovery-token-ca-cert-hash sha256:49ff7a97c017153baee67c8f44fa84155b8cf06ca8cee067f766ec252cb8d1ac
- 确认环境正常
[kiosk@k8s-master]
$ kubectl get nodes
NAME STATUS ROLES AGE VERSION
k8s-master Ready control-plane 3m42s v1.27.1
k8s-worker1 Ready <none> 60s v1.27.1
k8s-worker2 Ready <none> 54s v1.27.1
$ kubectl get pod -A
NAMESPACE NAME READY STATUS RESTARTS AGE
kube-system calico-kube-controllers-786b679988-jqmtn 1/1 Running 0 2m58s
kube-system calico-node-4sbwf 1/1 Running 0 71s
kube-system calico-node-cfq42 1/1 Running 0 65s
kube-system calico-node-xgmqv 1/1 Running 0 2m58s
kube-system coredns-7bdc4cb885-grj7m 1/1 Running 0 3m46s
kube-system coredns-7bdc4cb885-hjdkp 1/1 Running 0 3m46s
kube-system etcd-k8s-master 1/1 Running 0 3m50s
kube-system kube-apiserver-k8s-master 1/1 Running 0 3m50s
kube-system kube-controller-manager-k8s-master 1/1 Running 0 3m50s
kube-system kube-proxy-2cgvn 1/1 Running 0 3m46s
kube-system kube-proxy-2zh5k 1/1 Running 0 65s
kube-system kube-proxy-nd5z8 1/1 Running 0 71s
kube-system kube-scheduler-k8s-master 1/1 Running 0 3m50s
$ kubectl get componentstatuses
Warning: v1 ComponentStatus is deprecated in v1.19+
NAME STATUS MESSAGE ERROR
etcd-0 Healthy {"health":"true","reason":""}
controller-manager Healthy ok
scheduler Healthy ok
- 附录
A1. 新节点加入 K8s 集群
- 查看 kubeadm init 命令的输出
- 使用 kubeadm token create 命令重新创建
[kiosk@k8s-master]$
kubeadm token create --print-join-command
A2. kubeadm reset
还原通过==kubeadm init==或==kubeadm join==对此主机所做的更改
[kiosk@k8s-master]$

echo y | sudo kubeadm reset
A3. 国内需要加速
| ID | 国内 | 国外 | 说明 |
| 1 | http://mirror.nju.edu.cn/ubuntu | 默认 | 系统软件仓库 |
| 2 | https://mirror.nju.edu.cn/docker-ce/linux/ubuntu | https://download.docker.com/linux/ubuntu | 运行时仓库 |
| 3 | registry.aliyuncs.com/google_containers | registry.k8s.io | google容器镜像仓库 |
| 4 | https://docker.nju.edu.cn/ | 默认 | docker容器镜像仓库 |
| 5 | http://k8s.ruitong.cn:8080/K8s | https://github.com/kubernetes-sigs/cri-tools/releases/download/v1.24.2 | crictl 命令 |
| 6 | https://mirror.nju.edu.cn/kubernetes/apt/ | https://apt.kubernetes.io/ | kubeadm, kubelet 软件仓库 |
| 7 | http://k8s.ruitong.cn:8080/K8s/calico/v3.25.0/manifests | https://raw.githubusercontent.com/projectcalico/calico/v3.25.0/manifests | calico.yaml 文件 |
A4 . Err1
The connection to the server localhost:8080 was refused - did you specify the right host or port?
[kiosk@k8s-worker2]$
mkdir ~/.kube
scp root@k8s-master:/etc/kubernetes/admin.conf \
~/.kube/config
kubectl get node
A5. RHEL布署
- 关闭 firewalld
- 关闭 SELinux
# firewalld
systemctl disable --now firewalld
# SELinux
sed -i '/^SELINUX=/s/=.*/=disabled/' \
/etc/selinux/config
reboot
A6. client - Windows
- 命令
# https://kubernetes.io/zh-cn/docs/tasks/tools/install-kubectl-windows/
# curl.exe -LO "https://dl.k8s.io/release/v1.28.1/bin/windows/amd64/kubectl.exe"
# 查看外部命令路径
Get-ChildItem Env:
$Env:PATH
# 下载
$Env:FURL = "http://k8s.ruitong.cn:8080/K8s/kubectl.exe"
curl.exe -L# $Env:FURL -o $Env:LOCALAPPDATA\Microsoft\WindowsApps\kubectl.exe
- 配置文件
## 配置文件 ##
# 创建文件夹
New-Item -Path $ENV:USERPROFILE -Name .kube -type directory

# 拷贝配置文件
scp vagrant@192.168.8.3:/home/vagrant/.kube/config $ENV:USERPROFILE\.kube\config
Password: `vagrant`

# 测试
kubectl get node
- 自动补全
# .\kubectl.exe completion -h
# 立即生效
kubectl completion powershell | Out-String | Invoke-Expression

# 永久生效
kubectl completion powershell > $ENV:USERPROFILE\.kube\completion.ps1